Choose your TV and wall mount
Just like there are many different types and sizes of TVs, there are also many different types of mounts. Depending on the customer's needs, they may need a small or large TV. What type of viewing angles will the customer want? Will it be okay if the viewing angle of the TV can't be adjusted after it is installed? Is the mount rated for the size and weight of the TV?
Depending on the scope and specifics of your project, you'll want to choose one of the following types of TV mounts:
Fixed mount – This type of TV mount is the simplest and least expensive. It keeps the TV in a stationary position and flush against the wall.
Swivel mount – A swivel TV mount allows the screen to pivot to the left and to the right.
Tilting mount – A tilting TV mount is primarily designed for situations in which the TV must be installed higher on a wall, giving you the ability to angle the screen down for optimal viewing.
Full-motion mount – This type of TV mount typically allows the user to adjust the TV right, left, up, down, tilt, and pull out from the wall and retract back in.
Motorized mount – This type of TV mount can be remote controlled to extend, retract, tilt and swivel.
When choosing a TV wall mount, make sure that it is designed to fit the TV you are mounting and that it is appropriately rated for that TV's size and weight.
Determine where you want to position the TV
Before mounting the TV, think about the best location to install the TV for the ideal height and viewing angle. You'll want to consider the layout of the room and where viewers are going to be seated.
Other key factors to consider:
- Choose a location with easy access to power outlets, cable input sources and connections for speakers or other accessories
- Determine where media components such as cable boxes and gaming consoles will be stored
- Avoid installing the TV screen where it will be exposed to direct sunlight
- Height of the TV viewing angle — usually the optimal viewing height is having the screen at the viewer's eye level when seated, however, some customers may prefer the location slightly higher
Tools you need to mount the TV
After you've determined the location and height of where you plan to mount the TV, you can get started on the mounting process. Make sure to have the right tools for the job.
You'll need the following:
In addition to these tools, you'll want an assistant to help you with lifting and mounting the TV. This is especially important for bigger televisions.
Find the studs
When mounting a TV to the wall, you must screw the mount into studs to have sufficient support for the weight of the TV. Once you've picked out the ideal location, it's easiest to find the studs with a stud finder.
- Find two wall studs
- For bigger mounts, you might need three studs
- When you find the location of each stud, mark the stud's center with a pencil
It's also possible that the mount's instructions will tell you how many studs need to be found for that particular mount.
Mark the pilot holes
Measure the distance between the top and bottom holes on each TV mounting arm and mark two points in the center of each stud that correspond with these holes. Use a level and tape measure to ensure that the holes are evenly spaced and level on both studs.
Use the mounting bracket as a frame and place it flat against the wall. Align the screw locations with the pilot hole marks and test that the bracket is level. After double checking your marks and that the bracket is level, drill pilot holes into the studs where you made the marks for mounting.
Mount the bracket to the wall
Place the mounting bracket to the wall and align it with the pilot holes you drilled. Have an assistant hold the bracket for you, if necessary. Drive the screws into the holes with a drill, ensuring they are tight enough to keep the bracket snug with the wall but don't overtighten. You don't want the bracket to bend or warp and you don't want it to sink into the drywall. After finishing, check to make sure that the bracket is level one last time. You should also make sure to leave access to any power or wire connections before mounting the bracket.
Attach the mounting plate to the TV
Each TV mount will have its own set of instructions on how to attach it to the TV you've chosen. The mounting plate for a fixed TV mount will be simpler to attach than the mounting plate for a full motion TV mount. So just follow the manufacturer’s instructions on how to attach the mounting plate of your specific mount to the back of your TV.
Mount the TV to the wall
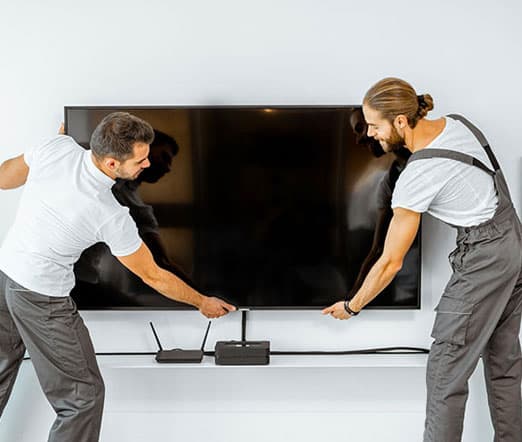
You'll want to get help with this last step. Although newer flat screen TVs might have gotten lighter than their predecessors, they are still too bulky and most likely too heavy for one person to mount on the wall alone.
Check the manufacturer’s guide for this step also because the way each mounting plate affixes to the wall mount varies from product to product. Double-check that the connection between the wall mount and the TV plate is secure. After you plug in the TV and all related accessories, the TV is ready to watch.


